Test your first AI application with surprising ease, even if you’ve never written a single line of code. Google AI Studio create, test, and deploy AI applications without the technical barriers that once made this field inaccessible.
Actually, Google AI Studio has revolutionized how newcomers approach AI development. Creating apps in Google AI Studio requires minimal setup, allowing you to focus on your ideas rather than complex implementation details. This beginner’s guide walks you through the essential steps to test your application effectively, from understanding the interface to deploying your finished product.
Throughout this guide, you’ll learn how to navigate the platform’s features, set up your project correctly, and use real-time testing toolsn to ensure your app works as intended. Additionally, we’ll cover debugging techniques and deployment options to help you share your creation with others.
Build Apps with Google AI Studio by Describing Your Idea
Imagine being able to build an app just by telling Google AI Studio what you want. You don’t need any coding skills — the platform uses your natural language prompts to generate the app’s structure for nocode blog. It’s like having a creative partner that wires everything together behind the scenes.
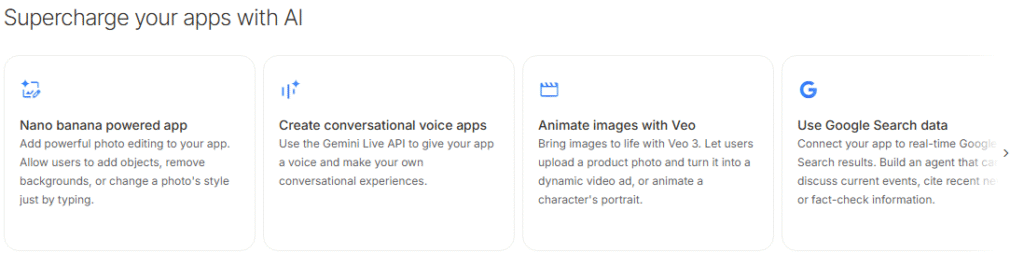
For example, one of Google’s AI tools works on images. The Gemini image model called Nano Banana can take a simple sketch or photo and instantly turn it into a polished, studio-quality blog design. Even if you’re not a professional artist, you can whip up custom graphics or infographics in seconds.
And you can even give your app a voice. Google’s new Live API listens through the microphone and replies in real time with a natural, human-like voiceai.google.dev. It’s like having a conversation — when you speak, the app talks back immediately.
When you want to add motion, Google’s Veo 3 can animate your visuals into short video clips complete with native audio deep mind. It doesn’t just create moving pictures — it automatically adds sound effects, ambient noise or even dialogue to make everything feel cinematic. The result looks and sounds incredibly realistic, all without you having to learn video editing.
On top of that, your AI Studio app can tap into live Google data. For example, it could pull in up-to-the-minute info (like today’s weather or live sports scores) via Google google search. In short, AI Studio’s drag-and-drop interface and multimodal AI tools let anyone — from hobbyists to designers — blend images, speech, video and real-time data into a smart, creative app. As Google says, you just describe “the app of your dreams,” and AI Studio does the “heavy lifting” to wire everything together for yo
Get to Know Google AI Studio
Google AI Studio serves as your gateway to powerful artificial intelligence capabilities, presenting an accessible environment where anyone can experiment with Google’s most advanced AI models. Before diving into your first app testing, let’s understand what makes this platform uniquely valuable for beginners and developers alike.
Overview of the interface
When you first access Google AI Studio at aistudio.google.com, you’ll notice a clean, browser-based interface designed for immediate productivity. Unlike complex development environments, everything happens in the cloud with no installation required – simply sign in with your Google account to begin.
The interface is thoughtfully divided into several key areas. The main workspace centers around a conversational window where you’ll interact with your chosen AI model. Meanwhile, the left sidebar serves as your organizational hub, housing the “Create new” button for starting fresh projects and access to your saved chat history in the Library.
At the top of the screen, a navigation bar provides access to essential resources including documentation, API keys, and your dashboard. Furthermore, the right sidebar contains the critical controls for fine-tuning your AI experience – from model selection to parameter adjustments that modify how your AI responds.
The center pane functions as your direct communication channel with the AI, featuring a prompt input field where you can type instructions or upload files. This streamlined design prioritizes fast experimentation and iteration, making it ideal for beginners looking to test their first applications.
Key features: Chat, Build, Media, API
Google AI Studio offers four primary modes that form the backbone of its functionality:
- Chat – The standard conversation interface where you can experiment with prompts and conduct multi-turn conversations with Gemini models. This area includes unique features like system instructions for defining the AI’s persona and parameter controls for adjusting creativity levels.
- Build – Perhaps most exciting for app creators, this tab enables you to construct complete web applications using just natural language descriptions. Simply describe what you want to build, and Gemini generates the necessary code behind the scenes, creating a functioning React or Angular app with a live preview.
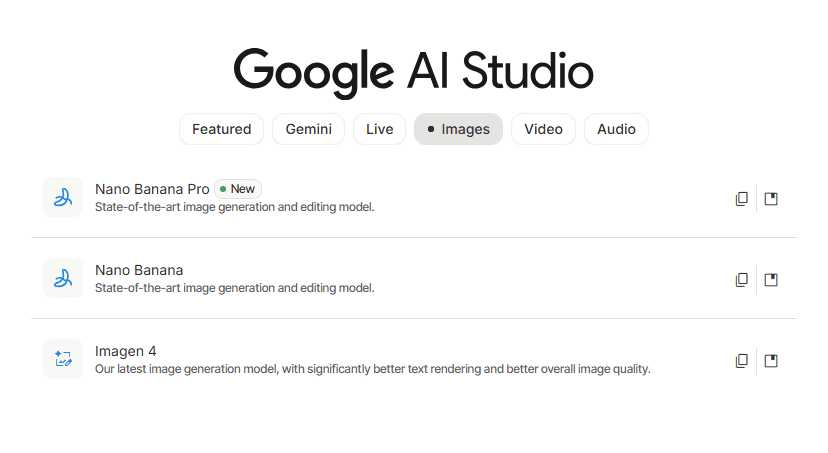
- Media – A dedicated space for generating images, videos, and audio through AI. This centralizes access to models like Imagen, Veo, and Lyria RealTime, allowing creative exploration without complex setups.
- Stream – This innovative feature lets you interact with AI in real-time using your voice, camera, or screen sharing – perfect for testing applications that respond to live input.
Beyond these core modes, Google AI Studio includes powerful capabilities like annotation mode for visual editing, one-click deployment to Cloud Run, and integration with your existing Google tools.
Why it’s great for beginners
Google AI Studio eliminates traditional barriers to AI development, making it exceptionally beginner-friendly. First and foremost, it’s completely free to use, requiring no credit card or trial period to access cutting-edge models. This zero-cost approach encourages experimentation without financial risk.
The platform requires minimal technical knowledge to get started. While coding skills can be helpful, many functions operate through intuitive interfaces with drag-and-drop elements. This accessibility extends to the prototyping process – you can test your ideas and refine your applications without writing complex code.
For those new to prompt engineering, the Prompt Gallery provides ready-made AI templates covering various use cases, from blog creation to summarization tools. Moreover, the “I’m Feeling Lucky” button generates creative project ideas when you need inspiration.
When you’re ready to move beyond experimentation, Google AI Studio seamlessly bridges the gap to production. The “Get Code” button translates your interactive session into ready-to-use code snippets, helping you transition from testing to implementation without starting from scratch.
Set Up Your First App Project
Now that you’re familiar with Google AI Studio’s capabilities, it’s time to create your first project. The platform makes app development remarkably straightforward, allowing you to focus on your ideas instead of complex coding.
Accessing the Build tab
Begin by navigating to AI Studio (aistudio.google.com) and signing in with your Google account. Once logged in, locate and select the “Build” option from the left sidebar navigation. This takes you to the app creation workspace where you’ll find several starting options.
The Build interface presents three main pathways to begin your project:
- Start with a descriptive prompt (from scratch)
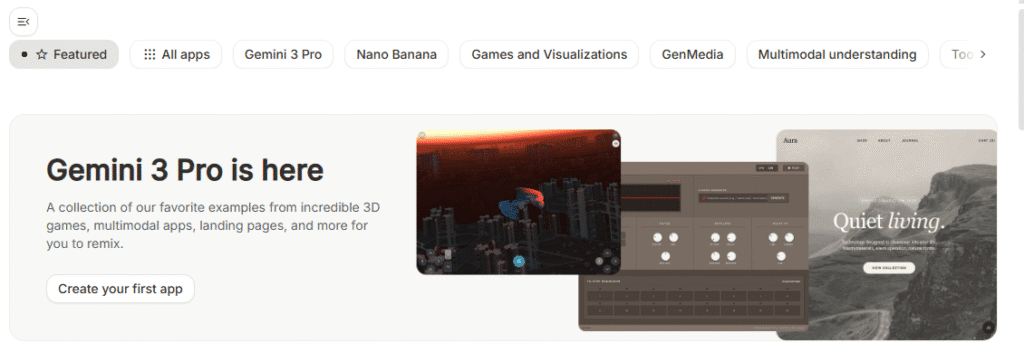
- Browse the app gallery to remix existing projects
- Use the “I’m Feeling Lucky” button for creative inspiration
For your first test project, the direct prompt approach offers the most straightforward experience. However, browsing example apps can provide valuable insights into what’s possible with the platform.
Writing your first prompt In Google Ai Studio
The magic of Google AI Studio happens in the prompt input box. This is where you’ll describe what you want to create in natural language. Think of this as a conversation with a skilled developer who will implement your vision.
For effective prompt writing:
- Be specific about your app’s purpose and functionality
- Describe both the visual elements and behaviors you want
- Mention any specific features like buttons or data inputs
- Keep your language clear and conversational
For instance, you might type: “Create a recipe generator that asks users for ingredients they have and suggests meals they can make. Include a ‘Generate New Recipe’ button.”
After entering your prompt, simply click “Run” or press Enter. The system will analyze your request and begin generating your application, displaying progress in real-time on the right side of the screen.
For beginners struggling with prompt ideas, AI Studio offers several approaches to get started. You can use the “I’m Feeling Lucky” button to generate random project ideas, select from starter examples like “Recipe generator using Gemini,” or choose from available templates.
Understanding the generated layout
Once your prompt runs, Google AI Studio creates a complete web application. By default, it generates a React web app, though you can choose Angular in the Settings menu if preferred.
The generated layout consists of two main views:
- Preview – Shows your functioning app in real-time
- Code – Reveals the underlying structure and logic
In the Code view, pay special attention to the geminiService.ts file, which contains the core functionality of your app. This includes prompt construction, API calls to Gemini, and response parsing. You can modify this file to adjust your app’s behavior or refine your base prompt.
The preview pane allows you to test your application immediately. Interact with the generated interface elements to see how they function and observe the AI responses. This instant testing capability enables rapid iteration – if something doesn’t work as expected, simply modify your prompt and regenerate.
What makes this process remarkable is that changes happen in real-time. Don’t like the design? Just tell the system: “Make the background darker with better text contrast” or “Add a fade-in animation when content changes.” The AI updates your app instantly, allowing for continuous refinement without manual coding.
Throughout this process, remember that you’re not just creating but also learning. Each generation provides insights into how AI interprets your instructions and translates them into functional code.
How to Test Your App in Real-Time
Once your application is generated, real-time testing becomes the critical next phase in your development journey. Google AI Studio provides robust tools to evaluate your app’s functionality before finalizing or sharing it with others.
Using the live preview canvas
The preview canvas serves as your immediate testing ground, automatically displaying your working application as soon as code generation completes. This canvas functions as a fully interactive environment where you can see changes in real-time without switching between development and testing environments. Subsequently, any modifications you request through prompts appear instantly in this preview window, enabling rapid iteration cycles.
To maximize the preview canvas:
- Examine the visual layout and design elements
- Note how components are arranged and styled
- Check if the interface matches your original vision
- Look for any rendering issues or visual bugs
Interacting with UI elements
Testing interaction is straightforward—simply use the app as an end user would. Click buttons, fill form fields, and navigate between sections to verify functionality. Primarily, you should focus on these key testing areas:
- Form validation – Test inputs with both valid and invalid data
- Button functionality – Ensure clickable elements trigger appropriate actions
- Navigation flow – Check that users can move logically between screens
The preview canvas operates exactly like a deployed application, allowing you to interact with all generated UI components in their native state.
Checking for prompt accuracy
Once familiar with the interface, evaluate if the application actually fulfills your original prompt requirements. Does it perform all the functions you specified? Are there missing features or unexpected behaviors?
To refine your app, simply type additional instructions like “Add save and download button” or “Show image history as edits are made,” and the system will implement these changes while maintaining your existing functionality.
Testing app logic and flow
Beyond surface-level testing, assess the application’s underlying logic. Enable logging in the AI Studio dashboard to track all GenerateContent API calls automatically without requiring code changes. This creates a comprehensive user interaction history that helps identify patterns or issues.
You can export logs as specific datasets (in CSV or JSONL format) for offline evaluation. These datasets prove invaluable for prompt refinement and performance tracking over time.
For thorough testing, consider these additional verification points:
- Responsive design on different screen sizes
- Error handling when network issues occur
- Performance speed with various inputs
- Console errors through browser DevTools
Remember that each interaction represents an opportunity to improve both your product and the model’s ability to deliver better responses [2]. Thorough testing in this stage significantly reduces issues after deployment.
Debug and Improve Your App
Even the best-designed AI applications encounter issues. Fortunately, Google AI Studio offers robust debugging tools to identify and resolve problems quickly. Let’s explore how to polish your application and ensure it performs exactly as intended.
Identifying common issues
Despite Google AI Studio’s user-friendly interface, several common obstacles might arise during testing. Many users report “Failed to list models” errors when loading the dashboard, permission denied messages despite being logged in, or pages stuck on white screens. These issues typically stem from account permissions, geographical restrictions, or backend maintenance.
Other frequent challenges include 403 Access Restricted errors (often location-based) and No Content responses when safety filters block generation [5]. Token usage limits can likewise constrain your application’s functionality, especially with complex prompts.
Using prompt feedback to fix bugs
One key challenge in AI development is maintaining consistent, high-quality results as you iterate. Google’s new logs and datasets feature tackles this pain point directly by automatically tracking all API calls without requiring code changes.
To improve prompt effectiveness, avoid ambiguous instructions like “analyze” or “improve” – always specify exact formats or outcomes. Similarly, keep examples consistent in style and complexity, and test JSON output with the Structured Output validator to prevent schema mismatches .
Refining UI and UX
After identifying issues, you can use natural language to refine your application. This approach—sometimes called “vibe coding”—lets you describe the desired changes conversationally . Simply tell the system “Make the background darker” or “Add fade-in animation when content changes,” and watch as your app updates in real-time .
For visual issues, the new Annotate feature (represented by a banana icon) enables adding comments directly onto UI screens. Once annotations are submitted, Gemini processes the feedback and implements context-aware UI changes.
Saving context with docs and logs
Enable logging in the AI Studio dashboard to track all GenerateContent API calls automatically. Each project has a storage limit of up to 1,000 logs, with entries expiring after 55 days unless saved .
You can export these logs as datasets (in CSV or JSONL format) for:
- Curating challenge sets that target improvement areas
- Creating sample sets for routine checks before deployment
- Building evaluation sets representative of real usage
These datasets prove invaluable for prompt refinement and long-term performance tracking .
Deploy or Export Your App
After perfecting your application, it’s time to share it with the world. Google AI Studio offers straightforward pathways to move your project from testing to production.
Deploying to Google Cloud Run
With just a single click, you can deploy your finished application directly to Google Cloud Run. Simply click the rocket icon in the preview section to initiate this process. Google AI Studio automatically handles the technical aspects—prompting you to enable necessary services like Cloud Build and Cloud Run .
Behind the scenes, your web assets are stored in a dedicated Google Cloud Storage bucket and served through an optimized proxy container . This approach makes deployments remarkably fast while providing a secure, public HTTPS endpoint with auto-scaling capabilities.
Critically, your Gemini API key remains securely managed server-side on Cloud Run, not accessible from client devices . This security measure protects your keys from exposure.
Exporting to GitHub
Alternatively, connect your GitHub account to export your project for ongoing development. This option creates a dedicated repository containing your generated code, enabling you to continue development in VS Code, Cursor, or other preferred IDEs .
The exported code remains clean, well-structured, and free from hidden dependencie. Each app modification within AI Studio updates your GitHub repository automatically .
When to use each option
Choose Cloud Run when you need:
- A public-facing application with minimal setup
- Automatic scaling (including to zero when not in use)
- Request-based billing with 100ms granularity
Opt for GitHub export when:
- Collaborating with a development team
- Integrating with existing workflows
- Requiring version control for ongoing development
Conclusion
Google AI Studio truly democratizes artificial intelligence development. Previously, building AI applications required extensive coding knowledge, but now anyone can transform ideas into functional apps through simple conversation with Gemini models.
Testing remains essential for app success. Through the real-time preview canvas, you gain immediate feedback on how users will experience your creation. This allows rapid iteration cycles without switching between development environments.
Debugging challenges will arise, yet Google AI Studio provides powerful tools to overcome them. From automated logging to visual annotation features, these capabilities help refine your application until it perfectly matches your vision. The ability to describe changes conversationally rather than through code makes the refinement process remarkably accessible.
Finally, deployment options give your tested application a path to the real world. Cloud Run offers one-click publishing with automatic scaling, while GitHub export facilitates team collaboration and integration with existing development workflows.
Throughout this beginner’s guide, we’ve seen how Google AI Studio eliminates traditional barriers to AI development. The platform handles complex technical details behind the scenes, letting you focus on creativity and problem-solving instead of implementation challenges. Whether building your first AI project or exploring new possibilities, this testing framework provides everything needed to bring your vision to life.
Start small, test thoroughly, and watch as your AI application evolves from concept to reality. The future of AI development belongs to everyone—not just coding experts—and your journey begins with that first test.